Introduction
\nCreating a wood storage cart is an excellent way to keep your workspace organized and your supplies easily accessible. This project not only enhances your productivity but also allows you to showcase your woodworking skills. In this article, we will explore advanced techniques focusing on joinery, precision, and achieving a professional finish for your storage cart.
\nMaterials and Tools Required
\nBefore we start building, let's gather the necessary materials and tools:
\n- \n
- Materials: 1. Plywood or hardwood for the cart body (3/4" thick recommended) 2. Solid wood for the cart frame (e.g., hardwood like oak or maple) 3. Wood screws 4. Wood glue 5. Casters (for mobility) 6. Finishing oil or paint \n
- Tools: 1. Table saw or circular saw 2. Miter saw 3. Router with a straight bit 4. Drill and drill bits 5. Clamps 6. Sander (orbital and hand sander) 7. Measuring tape and square \n
Designing the Cart
\nBefore cutting any wood, you should design your cart. Consider the following:
\n- \n
- Dimensions: Determine how much storage space you need and the size of your cart. \n
- Compartments: Plan the layout of shelves and bins to hold your supplies. Use SketchUp or similar software for precision. \n
- Mobility: Decide on the number of casters and their placement for optimal maneuverability. \n
Creating the Cart Frame
\nThe frame will provide stability and support for your cart.
\n- \n
- Cutting the Frame Pieces: Using your table saw, cut the frame pieces from solid wood. Typical dimensions for a small cart might be 24" x 18" x 36". \n
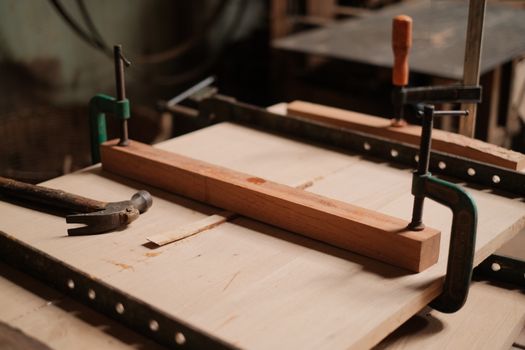
- Joinery Techniques: Use advanced joinery techniques such as mortise and tenon or pocket hole joinery. Mortise and tenon joints are ideal for durability. If you choose pocket holes, ensure that they are positioned discreetly. \n
- Assembly: Assemble the frame using wood glue and clamps. Allow the glue to cure before moving to the next step. This ensures a strong bond. \n
Building the Cart Body
\nNext, we'll build the cart's body to hold your supplies.
\n- \n
- Cutting the Panels: Cut the plywood or hardwood panels for the sides, top, and bottom of the cart. Ensure that all edges are square for a precise fit. \n
- Edge Banding: If using plywood, apply edge banding to the exposed edges for a professional finish. Use an iron to adhere the banding and trim excess with a utility knife. \n
- Assembly: Attach the sides to the bottom panel using wood glue and screws. Ensure that everything is square and flush. Use clamps to hold everything in place as the glue dries. \n
Adding Shelves and Dividers
\nTo maximize organization, consider adding shelves and dividers within the cart.
\n- \n
- Deciding on Shelf Placement: Based on your supply needs, determine where to place the shelves. Common configurations include adjustable shelves for flexibility. \n
- Creating Shelf Supports: Use dados or shelf pins for adjustable shelving. Dados provide a stronger support than pins, making them ideal for heavy items. \n
- Installing Shelves: Once the supports are in place, insert the shelves and check for levelness. \n
Finishing Touches
\nThe finish is crucial in achieving a professional look and protecting the wood.
\n- \n
- Sanding: Sand all surfaces starting with a coarse grit (80) and moving to a finer grit (220). Ensure that all edges are smooth to the touch. \n
- Choosing a Finish: Select a finish that suits your style. Options include clear varnish, oil, or paint. Applying multiple coats will provide better durability. \n
- Applying the Finish: Apply your chosen finish with a brush or rag, following the manufacturer’s instructions. Allow adequate drying time between coats. \n
Adding Casters for Mobility
\nTo make your cart mobile, adding casters is essential:
\n- \n
- Selecting Casters: Choose heavy-duty casters that can support the weight of the cart when fully loaded. \n
- Attaching Casters: Install the casters on the bottom of the cart. Ensure they are secured tightly to prevent wobbling. \n
Conclusion
\nBuilding a wood storage cart that is both functional and aesthetically pleasing requires skill, precision, and attention to detail. By utilizing advanced joinery techniques and ensuring a professional finish, you can create a piece that not only meets your storage needs but also enhances your workspace. For detailed plans and additional resources, consider checking out Ted Woodworking, which offers a plethora of woodworking plans to inspire your next project.
\nFAQs
\n- \n
- What type of wood should I use for a storage cart? For durability and aesthetics, hardwoods like oak or maple are recommended, while plywood is a cost-effective alternative. \n
- How can I ensure my cart is stable? Utilize strong joinery techniques such as mortise and tenon joints and ensure that the cart is evenly weighted. \n
- What finish is best for a wood cart? A clear varnish or an oil finish provides durability and enhances the natural beauty of the wood. \n
📚 Related Articles
🔨 Want 16,000+ Woodworking Plans?
Get instant access to step-by-step plans with blueprints and cut lists.
Get Instant Access →