Understanding End Grain
When working with wood, you will often encounter end grain, the exposed surface of wood that is cut across the grain. This area can be particularly challenging to finish because it absorbs finishes differently than flat or face grain. Properly finishing end grain is essential for achieving a smooth, attractive appearance and ensuring durability. In this article, we will explore common mistakes made during the finishing process and provide troubleshooting tips to help you achieve the best results.
Common Mistakes to Avoid
Before diving into the best practices for finishing end grain, it's crucial to recognize common pitfalls that can lead to undesirable outcomes.
1. Skipping Sealing Steps
A frequent mistake is neglecting to seal the end grain before applying the final finish. End grain is porous and absorbs moisture and finishes differently than face grain, leading to uneven coloration and blotchiness.
- Solution: Use a wood sealer or sanding sealer specifically designed for wood. Apply a thin coat and allow it to dry before sanding lightly to prepare for the final finish.
2. Using the Wrong Finish
Not all finishes are suitable for end grain. Some finishes may not penetrate well or could leave a sticky surface.
- Solution: Consider using oil-based finishes, which penetrate deeper into the wood. Products like Danish oil or tung oil are excellent choices for enhancing and protecting end grain.
3. Applying Too Much Finish
Applying excessive amounts of finish can lead to drips, uneven surfaces, and a tacky feel. End grain can soak up a lot of finish, and if you’re not careful, it can create a thick, unsightly layer.
- Solution: Apply the finish in thin, even coats. Use a brush or a cloth to wipe off excess after application. Multiple thin coats are better than one thick coat.
4. Not Sanding Properly
Improper sanding can leave scratches and imperfections on the end grain, which will be highlighted once the finish is applied.
- Solution: Sand the end grain with progressively finer grits of sandpaper, moving from coarser grits (like 120) up to finer grits (like 220 or even 320). Always sand in the direction of the grain.
Best Practices for Finishing End Grain
Now that we've covered common mistakes, let's focus on best practices that can help you achieve a stunning finish on your woodworking projects.
1. Test Before You Apply
Before applying any finish to your final piece, always test it on a scrap piece of the same wood. This will give you an idea of how the wood will react and help you adjust your technique accordingly.
2. Use a Pre-Stain Conditioner
To combat blotchiness on softwoods or certain hardwoods, consider using a pre-stain conditioner. This product helps to ensure even absorption of the finish.
- Application Tip: Apply the conditioner according to the manufacturer's instructions and allow it to sit for a specified time before applying your finish.
3. Emphasize Patience
Finishing is as much about patience as it is about technique. Take your time between coats and allow proper drying time. Rushing can lead to mistakes and an unsatisfactory finish.
- Drying Time: Refer to the finish manufacturer's guidelines for recommended drying times. Adhering to these can prevent issues like smudging or uneven finishes.
4. Consider the Environment
The environment in which you finish your project can significantly impact the outcome. High humidity or low temperatures can affect drying times and the application process.
- Tip: Finish projects in a controlled environment, ideally between 70°F and 80°F with low humidity, to ensure optimal conditions.
5. Finish with a Buffing Technique
After applying your final coat, consider buffing the surface lightly with a soft cloth to create a smooth, polished finish. This technique can enhance the depth of the wood grain and help even out any inconsistencies.
Resources for Further Learning
If you are looking for detailed plans and guidance on woodworking projects, Ted Woodworking is a fantastic resource. They offer a wide range of plans that can help you build a variety of furniture pieces while providing insights on finishing techniques.
Conclusion
Finishing end grain can be a tricky endeavor, but by avoiding common mistakes and following best practices, you can achieve beautiful results. Always remember to test your finishes, be patient, and pay attention to environmental factors. With these tips, your woodworking projects will not only look stunning but will also stand the test of time.
Frequently Asked Questions
1. Why does end grain absorb more finish than face grain?
End grain is more porous and has larger openings compared to face grain, making it more absorbent. This is why it is crucial to seal it properly to avoid uneven finishes.
2. Can I use water-based finishes on end grain?
Yes, you can use water-based finishes, but they may raise the grain of the wood. It is often recommended to sand the end grain after applying a water-based finish to achieve a smoother surface.
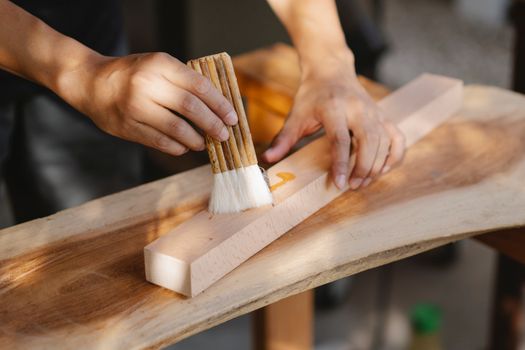
3. What is the best way to apply oil finishes to end grain?
Use a brush or cloth to apply oil finishes liberally to the end grain. Allow it to soak in for a few minutes, then wipe off excess to avoid a sticky surface. Multiple thin applications are recommended for the best results.
📚 Related Articles
🔨 Want 16,000+ Woodworking Plans?
Get instant access to step-by-step plans with blueprints and cut lists.
Get Instant Access →