Introduction
Creating custom wooden gifts can be a rewarding experience, especially when you use simple tools to achieve beautiful results. Whether it's a personalized cutting board, a unique picture frame, or a handcrafted toy, the satisfaction of giving a gift made with your own hands is unmatched. In this article, we will explore advanced techniques that focus on joinery, precision, and achieving a professional finish, making your beginner projects stand out.
Gathering Your Tools
Before diving into your woodworking project, it’s essential to understand the tools you will need. While advanced woodworkers often have an extensive workshop, you can create stunning pieces using just a few basic tools:
- Hand saw: For clean cuts on your wood pieces.
- Chisels: For precise cutting and shaping of joints.
- Clamps: To hold your workpieces together while the glue dries.
- Square: Ensures your pieces are perfectly aligned.
- Sandpaper: For a smooth finish and refinement of edges.
- Wood glue: Essential for strong joints.
Understanding Joinery Techniques
One of the critical aspects of creating professional-quality wooden gifts is mastering joinery techniques. These techniques not only enhance the aesthetics of your project but also ensure stability and durability.
1. Butt Joints
The simplest type of joint, a butt joint involves joining two pieces of wood by simply butting them together. While this joint is easy to make, it can be strengthened with wood glue and clamps.
2. Dado Joints
Dado joints involve cutting a channel into one piece of wood, allowing another piece to fit snugly inside. This joint provides added surface area for glue, increasing strength. You can create dado joints with a table saw or hand saw and chisel for beginners.
3. Biscuit Joints
Biscuit joints are created by cutting crescent-shaped slots into two pieces of wood and inserting a biscuit (a small, oval-shaped piece of wood) into the slots. This technique is excellent for aligning edges, particularly in tabletops or larger projects.
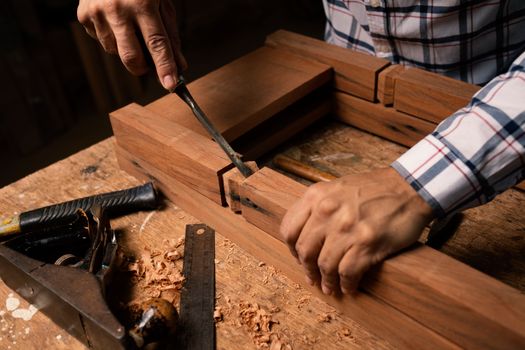
4. Mortise and Tenon Joints
This traditional joinery technique is highly regarded for its strength. A mortise is a hole cut into one piece of wood, while a tenon is a protruding piece on another that fits into the mortise. While more complex, this joint can be achieved with simple chisels and is worth the effort for a professional finish.
Precision in Woodworking
Precision is crucial in woodworking, especially when creating custom gifts. The following tips will help ensure that your cuts and joints are accurate:
- Measure Twice, Cut Once: Always double-check your measurements before making any cuts.
- Use a Square: A square will help you ensure that your angles are right, resulting in a better fit for your joints.
- Mark Your Cuts Clearly: Use a sharp pencil or marking knife for accurate, visible lines.
- Practice on Scrap Wood: Before working on your final piece, practice your cuts and joints on scrap wood to hone your skills.
Achieving a Professional Finish
A professional finish can make a significant difference in the appearance of your wooden gifts. Follow these steps to achieve a beautiful surface:
- Sanding: Start with a coarse grit sandpaper (like 80) and gradually move to finer grits (220 or higher) to create a smooth surface.
- Staining: Apply wood stain to enhance the natural beauty of the wood. Test the stain on scrap wood to see how it looks before applying it to your project.
- Sealing: Use a wood finish or sealant to protect your project. Options include polyurethane, varnish, or natural oils like tung or linseed oil.
Using Ted's Woodworking for Plans
If you are looking for inspiration or detailed plans to start your woodworking journey, Ted's Woodworking is a fantastic resource. It offers a plethora of projects with step-by-step instructions, making it easier for beginners to tackle complex woodworking tasks.
Conclusion
Creating custom wooden gifts with simple tools is not only possible but can also lead to beautiful and professional-looking results. By focusing on advanced joinery techniques, precision in your cuts, and achieving a fine finish, you can craft stunning pieces that your friends and family will cherish. So gather your tools, choose a project, and start creating! The world of woodworking awaits you.
FAQ
1. What is the easiest joinery technique for beginners?
The butt joint is the simplest joinery technique, making it ideal for beginners. However, consider using wood glue to strengthen the joint.
2. How can I ensure my cuts are straight?
Using a square to mark your cuts and a straight edge can help ensure that your cuts are straight. Taking your time and measuring carefully is also key.
3. Can I use reclaimed wood for my projects?
Yes, reclaimed wood can add character to your projects! Just be sure to inspect it for nails or damage and sand it thoroughly before use.
📚 Related Articles
🔨 Want 16,000+ Woodworking Plans?
Get instant access to step-by-step plans with blueprints and cut lists.
Get Instant Access →