Introduction
Wood finishing is a crucial step in furniture building that can make or break the final appearance of your project. Even seasoned woodworkers can encounter mistakes during the finishing process. Fortunately, many of these common errors can be fixed easily with the right tools and techniques. In this article, we will explore how to correct these mistakes like a pro and recommend specific tools to help you achieve a flawless finish.
Common Wood Finishing Mistakes
Before diving into solutions, let’s identify some of the most common wood finishing mistakes:
- Drips and Runs: Excess finish that pools on the surface.
- Uneven Coverage: Areas that appear lighter or darker than others.
- Scratches and Dings: Surface imperfections that can occur during the application.
- Cloudy Finish: A milky appearance often caused by moisture or incompatible products.
- Orange Peel: A bumpy texture that resembles the skin of an orange.
Fixing Drips and Runs
Drips and runs can be frustrating, but they are relatively easy to fix. If you notice drips after the finish has dried, follow these steps:
- Tools Needed: Fine-grit sandpaper (320 to 400 grit), a sanding block, and clean cloths.
- Step 1: Use fine-grit sandpaper to gently sand down the drips.
- Step 2: Wipe the area clean with a cloth to remove any dust.
- Step 3: Reapply the finish, ensuring an even application.
Recommended Tool: 3M Pro Grade Sandpaper - It’s durable and provides a smooth finish. However, it can be more expensive than generic brands.
Correcting Uneven Coverage
Uneven coverage can be caused by improper application techniques. To fix this issue:
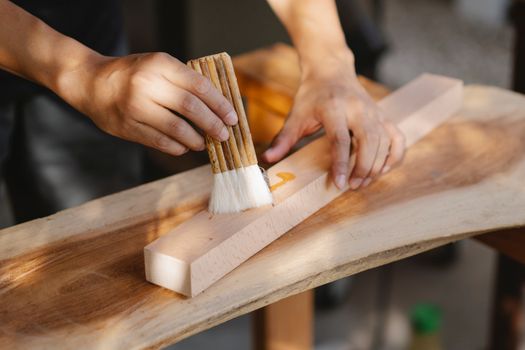
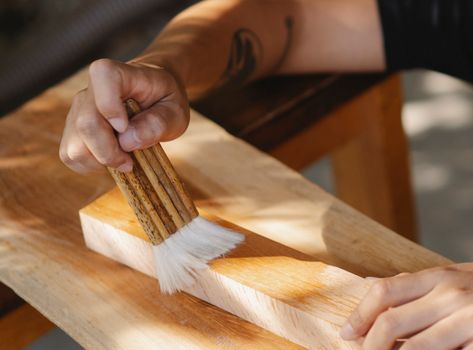
- Tools Needed: Foam brush or high-quality natural bristle brush, and the same finish used originally.
- Step 1: Lightly sand the uneven areas to create a smooth surface.
- Step 2: Apply a thin layer of finish using a foam brush for better control.
- Step 3: Let it dry and check for consistency. Repeat if necessary.
Recommended Tool: Purdy Nylox Brush - This brush allows for smooth applications and is easy to clean, but it may require more effort to maintain than foam brushes.
Fixing Scratches and Dings
Scratches and dings can be unsightly but can be easily remedied:
- Tools Needed: Wood filler, putty knife, and touch-up marker or stain.
- Step 1: Apply wood filler to the scratch or ding, smoothing it out with a putty knife.
- Step 2: Once the filler is dry, sand it flush with the surrounding area.
- Step 3: Use a touch-up marker or stain to blend the repair.
Recommended Tool: Elmer's Carpenter's Wood Filler - This filler is easy to work with and dries quickly, although it may shrink slightly as it cures.
Eliminating Cloudy Finish
A cloudy finish often indicates moisture or an incompatible product. To resolve this issue:
- Tools Needed: Heat gun or hairdryer, clean cloth.
- Step 1: Use a heat gun or hairdryer on a low setting to gently warm the cloudy area.
- Step 2: Wipe the area with a clean cloth to see if the cloudiness disappears.
- Step 3: If the cloudiness persists, you may need to strip the finish and reapply.
Recommended Tool: Wagner HT1000 Heat Gun - This tool is versatile and great for many applications, but be cautious as overheating can damage the wood.
Fixing Orange Peel Texture
Orange peel texture can ruin the appearance of your project. To fix this issue:
- Tools Needed: Fine-grit sanding sponge, spray can of finish or HVLP sprayer.
- Step 1: Lightly sand the area with a fine-grit sanding sponge.
- Step 2: Clean the surface and reapply the finish using an HVLP sprayer for a smoother application.
Recommended Tool: Fuji Spray HVLP Sprayer - Known for its smooth finish and efficiency, but it comes at a higher price point.
Conclusion
Wood finishing mistakes are common, but with the right tools and techniques, you can fix them efficiently. Whether you are dealing with drips, uneven coverage, scratches, cloudy finishes, or orange peel texture, these solutions will help you achieve a professional-grade finish. For more comprehensive woodworking plans and tips, consider checking out Ted Woodworking, a valuable resource for any woodworker.
FAQ
- What is the best way to avoid wood finishing mistakes?
Proper preparation and application techniques are key. Always read product instructions and practice on scrap wood. - Can I use different brands of finish on the same project?
It’s best to use compatible finishes from the same brand to avoid issues like cloudiness or peeling. - How can I tell if my wood finish is fully cured?
Perform a scratch test in an inconspicuous area. If it feels hard and doesn’t scratch easily, it’s likely cured.
📚 Related Articles
🔨 Want 16,000+ Woodworking Plans?
Get instant access to step-by-step plans with blueprints and cut lists.
Get Instant Access →