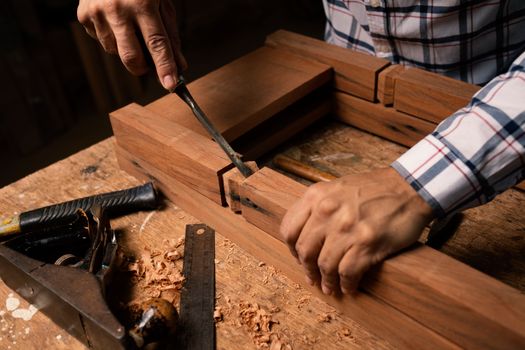
The Importance of Sanding in Woodworking
Sanding is often seen as a tedious task in woodworking, yet it plays a crucial role in achieving high-quality results. Whether you’re building a simple bookshelf or an intricate dining table, the sanding process can significantly impact both the aesthetics and durability of your project. In this article, we will explore the role of sanding in woodworking projects, especially from a budget-conscious perspective.
Why Sanding is Essential
Before diving into the techniques and tools, it’s important to understand why sanding is essential in woodworking:
- Surface Preparation: Sanding smooths the surface of the wood, removing rough spots, splinters, and imperfections that can affect both the look and feel of the finished product.
- Finish Adhesion: A well-sanded surface allows stains, paints, and finishes to adhere better, resulting in a more durable and visually appealing finish.
- Wood Grain Enhancement: Proper sanding can enhance the natural beauty of the wood grain, making your project look more professional and polished.
- Preventing Damage: Sanding can help prevent future damage by smoothing out any areas that may be prone to chipping or peeling.
Sanding Techniques for Budget Builds
When working on a budget, it’s essential to approach sanding strategically. Here are some cost-effective sanding techniques to consider:
1. Choose the Right Sandpaper
Instead of investing in expensive sandpaper, look for budget-friendly options. Here are some tips:
- Opt for sandpaper that suits your project type. For example, use coarse grit (60-80) for initial shaping, medium grit (120-150) for smoothing, and fine grit (220+) for finishing touches.
- Look for bulk packs or sales at local hardware stores, which can save you money in the long run.
2. Use Hand Sanding for Small Projects
For small or detailed projects, hand sanding can be more effective and economical than using power sanders. It gives you greater control and allows you to focus on intricate areas without the risk of damaging the wood.
3. Invest in an Affordable Orbital Sander
If you have larger projects, consider investing in an affordable orbital sander. While this is an upfront cost, it can save you time and effort in the long run. Look for options that are lightweight and easy to handle, making them perfect for beginners.
4. Use a Dust Collection System
When sanding, dust can accumulate quickly, leading to wasted time and materials. A simple dust collection system, such as a shop vacuum or dust bag, can keep your workspace clean and ensure you’re not losing valuable wood particles.
Finding Affordable Materials
When embarking on woodworking projects, the materials you choose can significantly affect your budget. Here are some tips on sourcing affordable materials:
- Reclaimed Wood: Look for reclaimed wood from old furniture or construction sites. It often comes at a lower cost and adds character to your projects.
- Local Lumber Yards: Visit local lumber yards instead of big box stores. They often have better prices and a wider variety of wood types.
- Online Resources: Websites like Ted Woodworking offer a plethora of plans that can help you choose materials wisely and avoid expensive mistakes.
The Final Sanding Process
After completing your woodworking project, the final sanding is crucial. Here’s how to approach it effectively:
- Start with a medium-grit sandpaper to remove any imperfections.
- Progress to finer grits to achieve a silky smooth finish.
- Always sand in the direction of the grain to prevent scratches.
- Consider using a sanding sealer to enhance the finish and protect the wood.
Conclusion
Sanding is not just a chore; it’s a vital step that can elevate your woodworking projects. By employing cost-effective sanding techniques and sourcing affordable materials, you can create beautiful furniture without breaking the bank. Remember, the effort you put into sanding will be reflected in the final product, so don’t skip this essential step!
FAQ
1. How often should I sand my woodworking projects?
It depends on the project and the finish you desire. Generally, sand at least twice: once for shaping and once for finishing.
2. Can I sand wood that has already been stained?
Yes, you can sand stained wood, but be gentle to avoid removing too much of the stain. Use fine-grit sandpaper to smooth the surface.
3. What is the best type of sandpaper for woodworking?
Aluminum oxide sandpaper is a popular choice for woodworking due to its durability and effectiveness. Choose the grit based on your specific needs.
📚 Related Articles
🔨 Want 16,000+ Woodworking Plans?
Get instant access to step-by-step plans with blueprints and cut lists.
Get Instant Access →